
Installing a water heater in your home is an important task that requires careful preparation and attention to safety. Whether replacing an old unit or installing a new one, understanding the basic steps will ensure the process goes smoothly. Begin by selecting the right type of water heater for your household needs. Consider factors such as fuel source, capacity, and energy efficiency. Electric and gas models are common options; each has specific installation requirements that must be followed closely.
Before starting the installation, turn off the main power supply or gas line to prevent accidents. Draining any existing water heater is essential to avoid spills during removal. Use a garden hose attached to the drain valve at the bottom of the tank and direct it toward a floor drain or outside area. Once drained, disconnect plumbing connections carefully using appropriate tools like pipe wrenches or adjustable pliers.
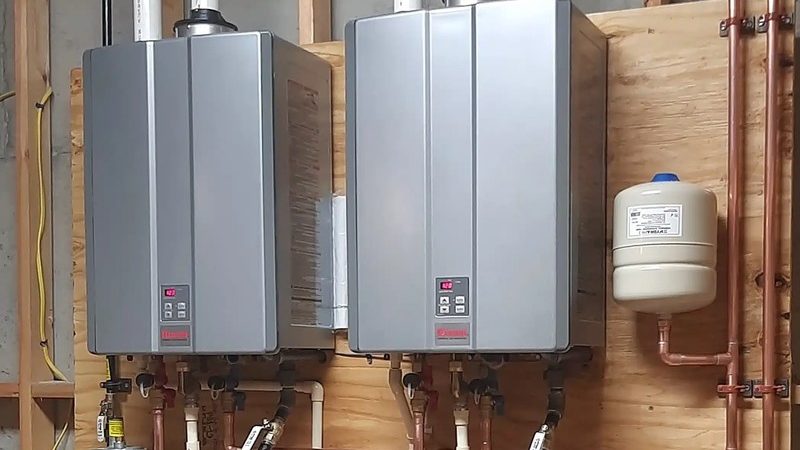
Positioning the new water heater correctly is crucial for both functionality and compliance with local building codes. It should be placed plumber near me existing plumbing lines to minimize modifications while allowing enough space for maintenance access. For gas heaters, proper ventilation must be ensured to prevent dangerous fumes from accumulating indoors.
Connecting water lines involves attaching cold-water supply pipes to the inlet valve and hot-water pipes to the outlet valve on top of the unit. Use Teflon tape on threaded connections to create watertight seals and tighten fittings securely without overtightening, which can cause damage. Installing shut-off valves on supply lines allows easy isolation of the heater in future repairs or emergencies.
If installing a gas model, connect it carefully following manufacturer guidelines and local regulations regarding venting systems and gas pipe sizing. A licensed professional may be required for this step depending on jurisdictional rules due to safety concerns related to combustion gases.
For electric heaters, ensure wiring matches voltage requirements indicated on labels inside access panels before connecting wires with wire nuts or terminal screws as specified by instructions provided with your unit.
Once all connections are made, open shut-off valves slowly while checking for leaks around joints using soapy water; bubbles indicate escaping air or water needing tightening adjustments.
Finally, restore power or reignite pilot lights according to manufacturer directions then allow time for heated water buildup before testing taps throughout your home for consistent temperature delivery.
Proper disposal of old units should comply with environmental standards since many contain materials requiring special handling procedures.
Following these steps carefully will help homeowners complete their water heater installations safely while ensuring reliable operation over time without unexpected issues arising from improper setup practices.
Service Squad
680 E Colorado Blvd, Suite 180, Pasadena, CA 91101
626-333-6519